LiteFinance에 계정을 등록하는 방법
신뢰할 수 있고 규제된 외환 브로커를 찾고 있다면 17년 이상의 경험과 전 세계 수백만 명의 고객을 보유한 세계 최고의 온라인 외환 브로커 중 하나인 LiteFinance에서 계좌 개설을 고려해야 합니다. LiteFinance는 다양한 거래 수단, 플랫폼 및 계좌 유형을 제공합니다. 이 기사에서는 LiteFinance에서 계정을 만드는 단계를 안내하고 각 계정 유형의 이점과 기능을 설명합니다.

웹 앱에서 LiteFinance 계정을 등록하는 방법
계정을 등록하는 방법
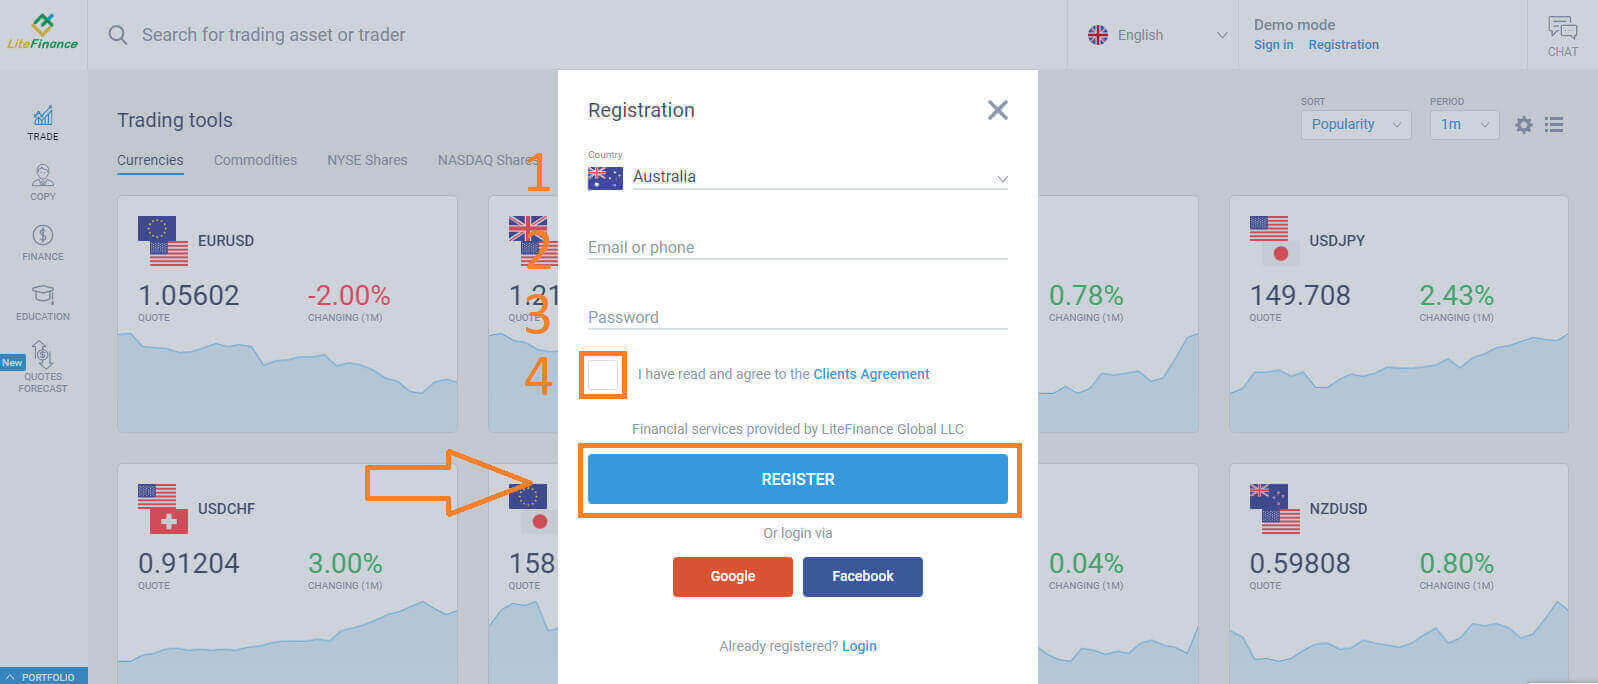
먼저 LiteFinance 홈페이지에 들어가야 합니다 . 그 후, 홈페이지 화면 오른쪽 상단의 '등록' 버튼을 클릭하세요.
등록 페이지에서 다음 작업을 완료하세요.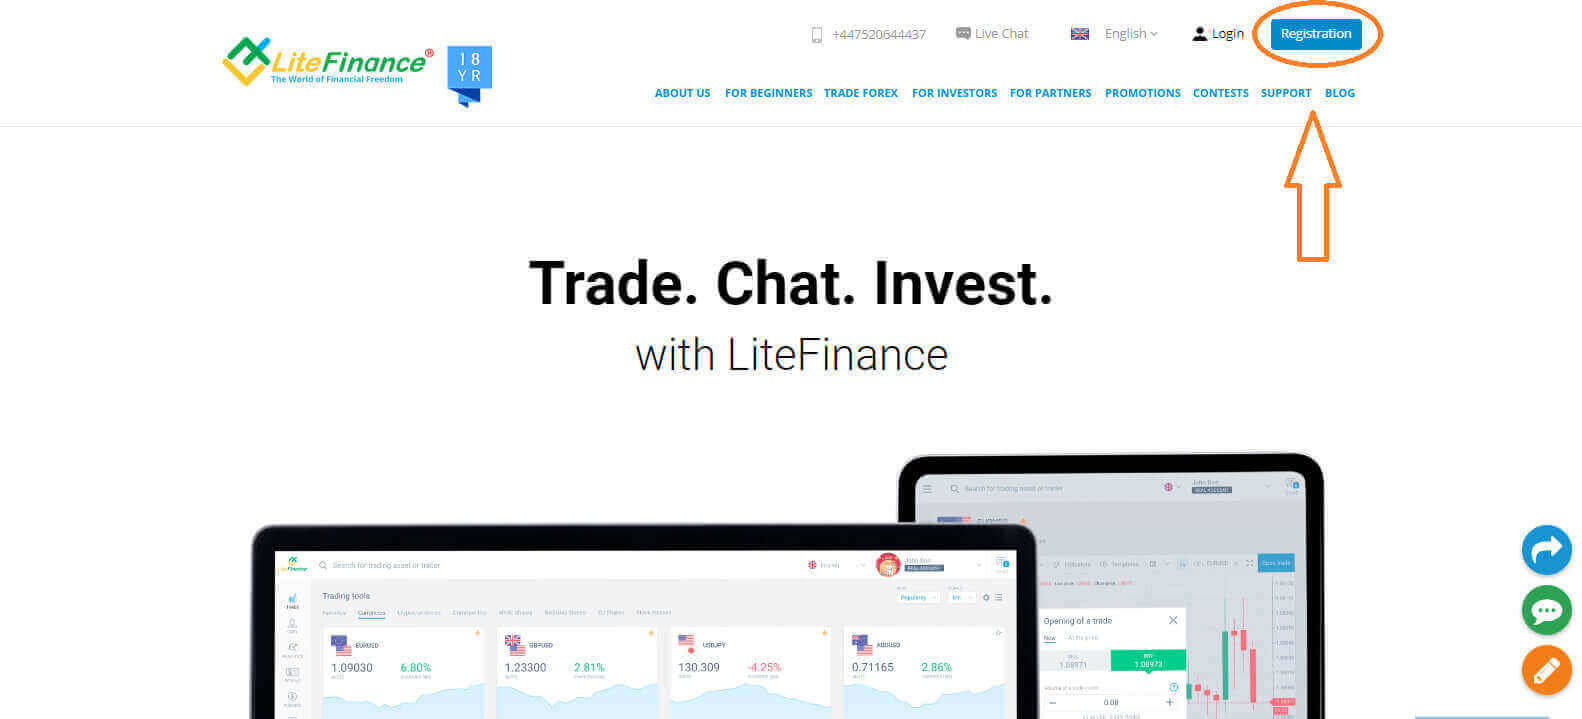
- 거주 국가를 선택하세요 .
- 귀하의 이메일 주소 또는 전화 번호를 입력 .
- 강력하고 안전한 비밀번호를 만드세요.
- LiteFinance의 고객 계약을 읽고 동의했음을 나타내는 확인란을 선택하십시오 .
잠시 후 인증번호가 발송됩니다. 이메일/전화번호를 확인해주세요. 그런 다음 "코드 입력" 양식을 작성 하고 "확인 " 버튼을 클릭하세요.
코드를 받지 못한 경우 2분마다 새 코드를 요청할 수 있습니다.
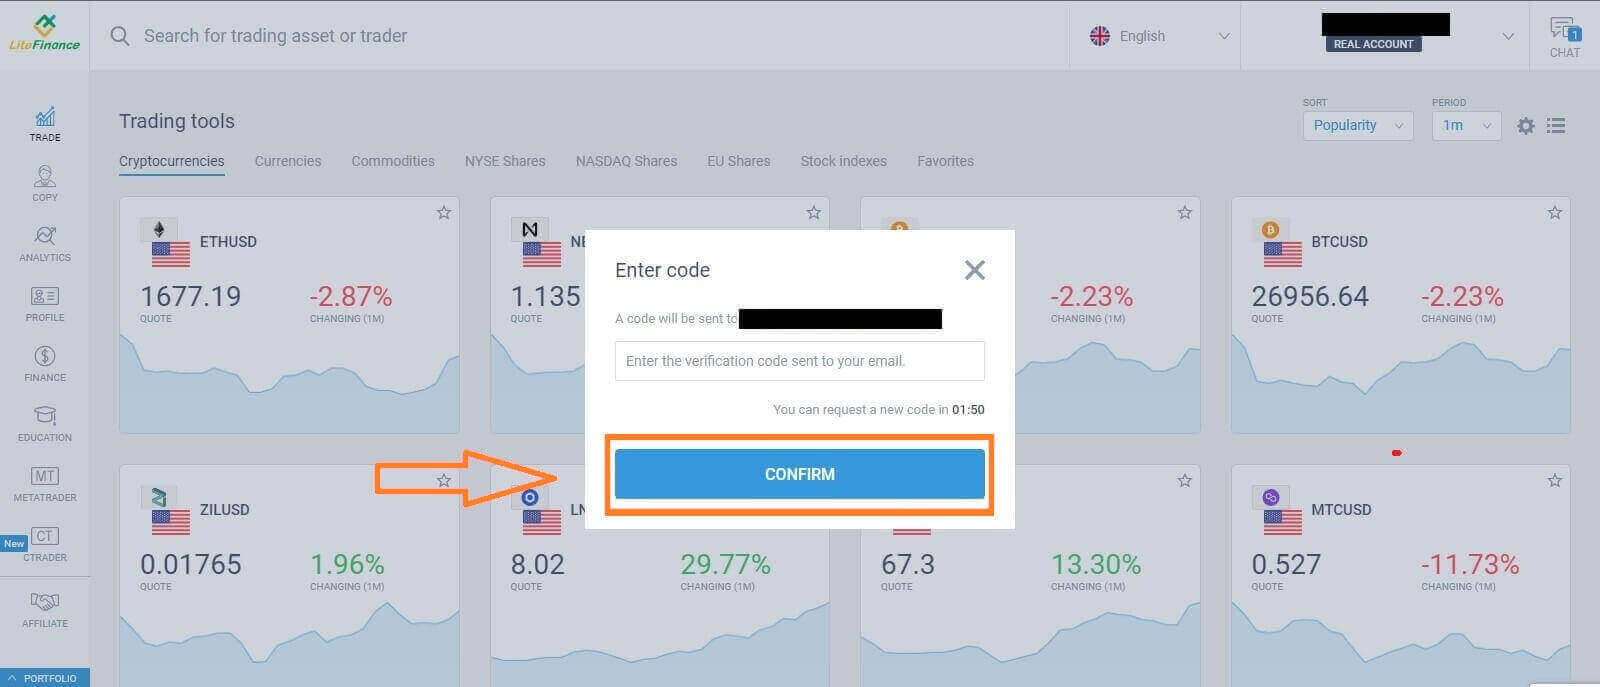
축하해요! 새로운 LiteFinance 계정에 성공적으로 등록되었습니다. 이제 LiteFinance 터미널 로 이동하게 됩니다 .
LiteFinance 프로필 확인
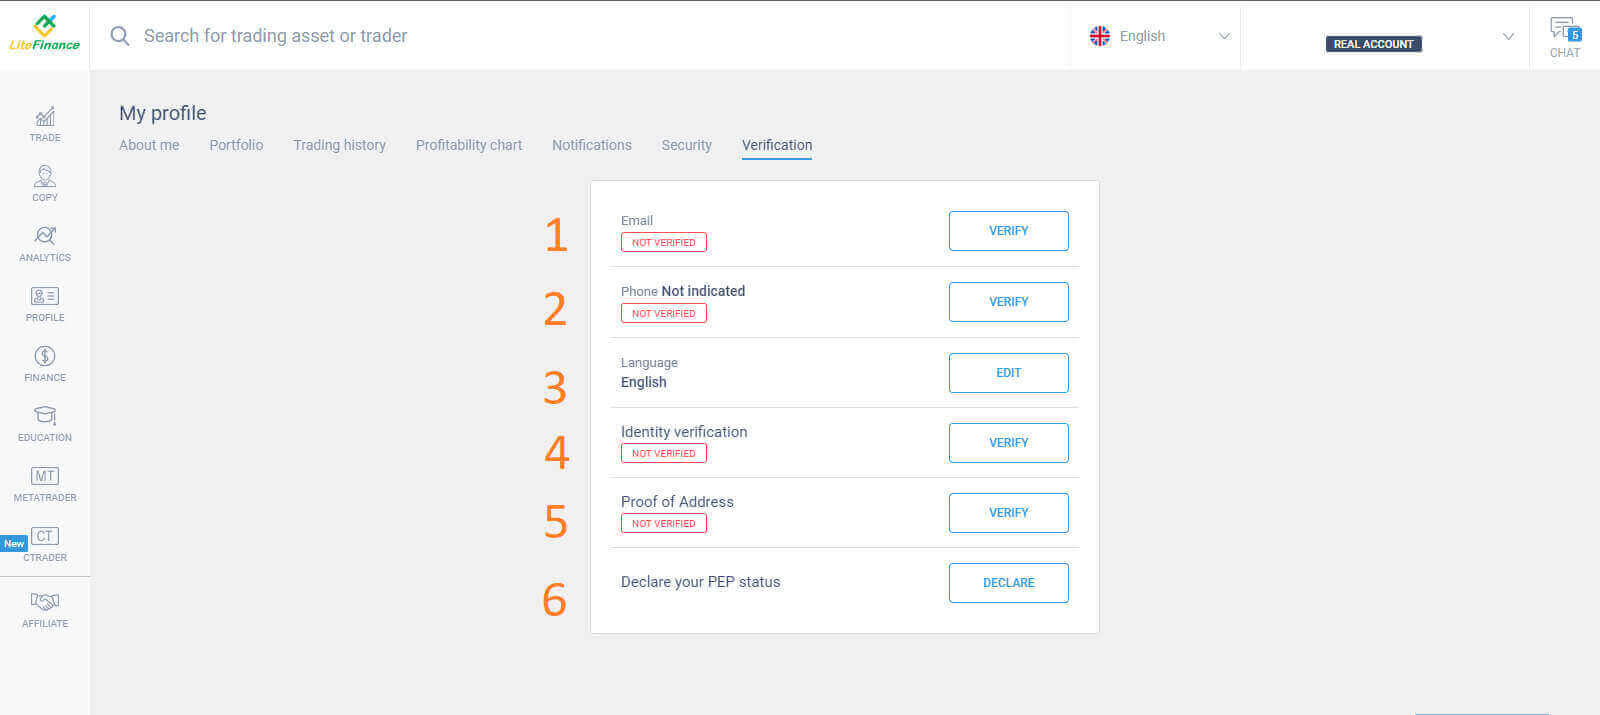
LiteFinance 계정을 생성하면 오른쪽 상단 모서리에 있는 채팅 상자 옆에 사용자 인터페이스가 나타납니다. 마우스를 "내 프로필" 로 이동하여 클릭하세요.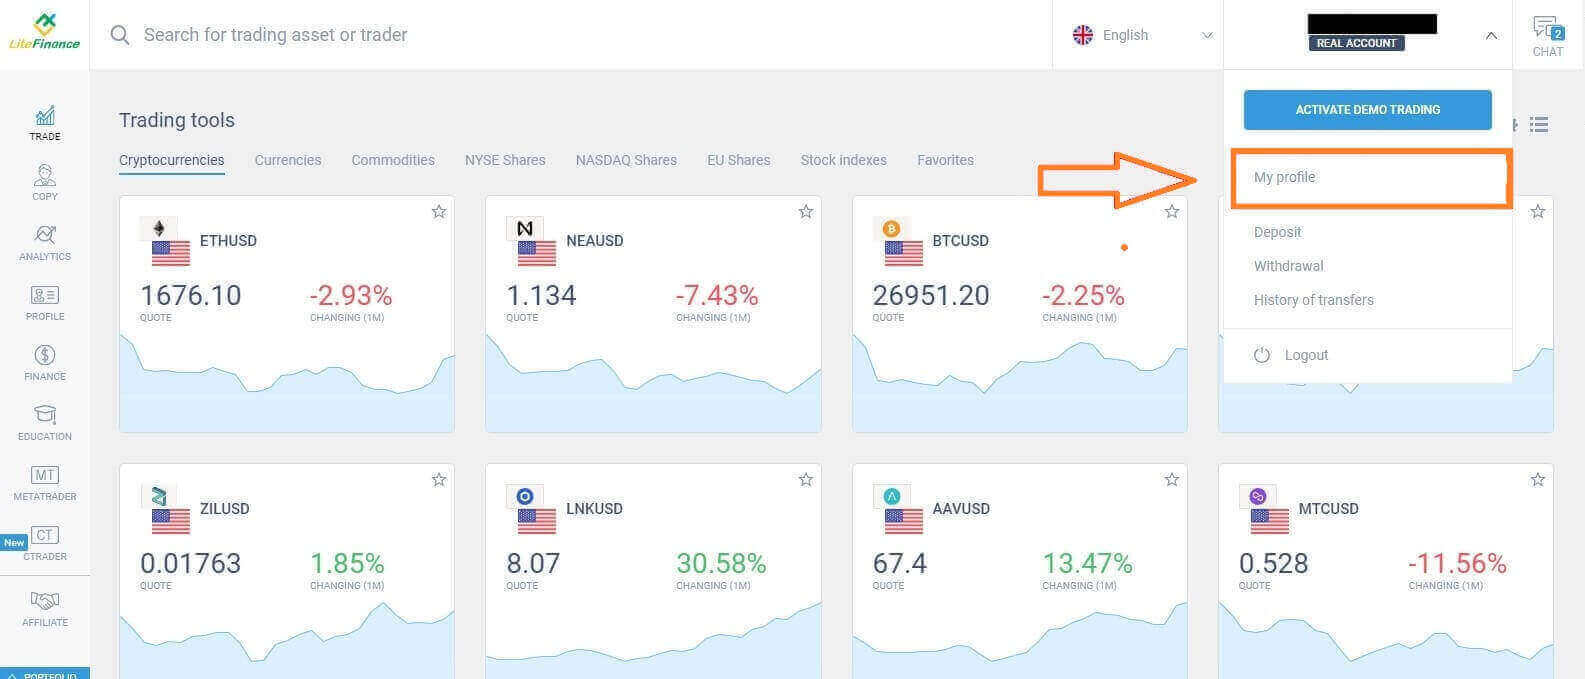 다음 페이지에서 "인증"을 클릭하세요.
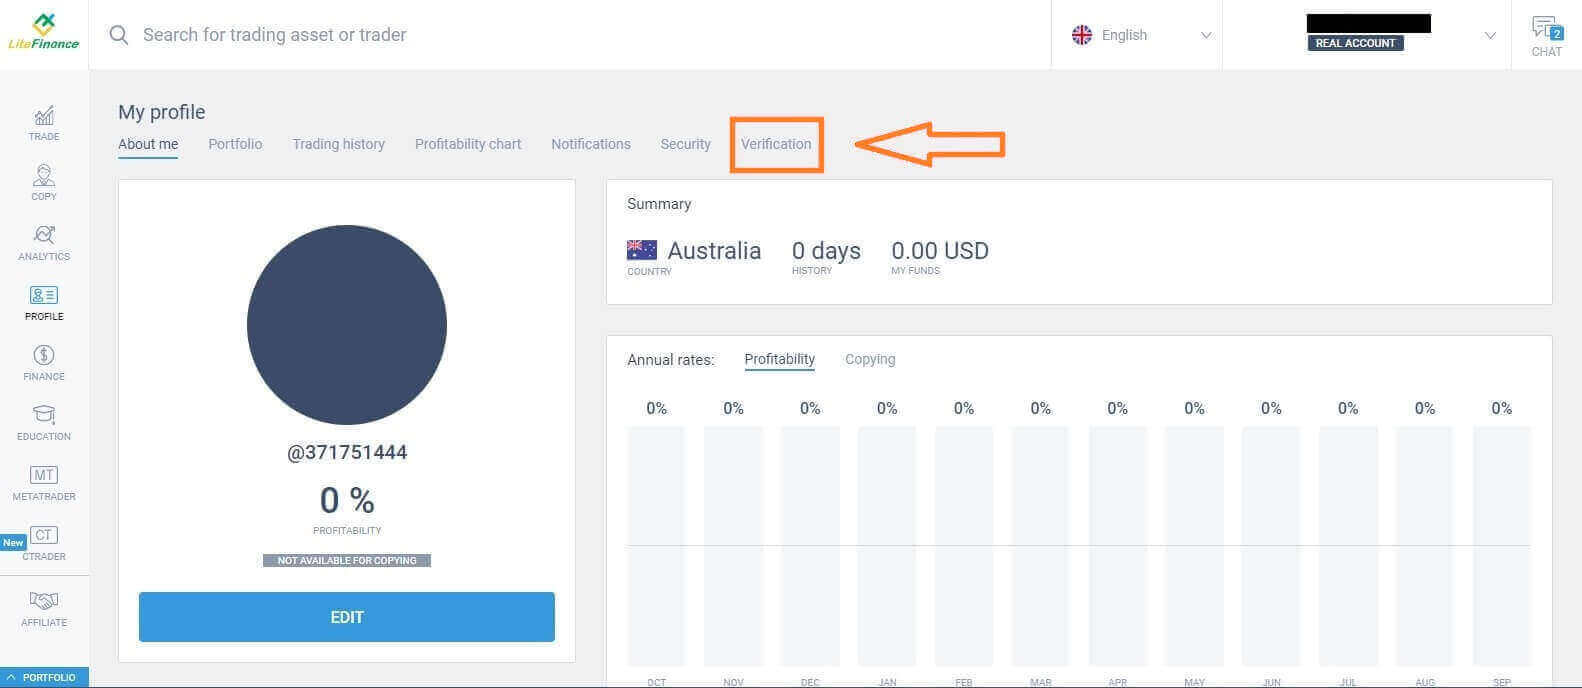
다음과 같은 정보를 확인하기 위해 작성해야 하는 양식이 화면에 표시됩니다.
- 이메일.
- 전화 번호.
- 언어.
- 이름, 성별, 생년월일을 확인합니다.
- 주소 증명(국가, 지역, 도시, 주소 및 우편번호).
- 귀하의 PEP 상태(PEP(정치적으로 노출된 인물)를 선언하는 확인란을 선택하면 됩니다.)
거래 계좌를 만드는 방법
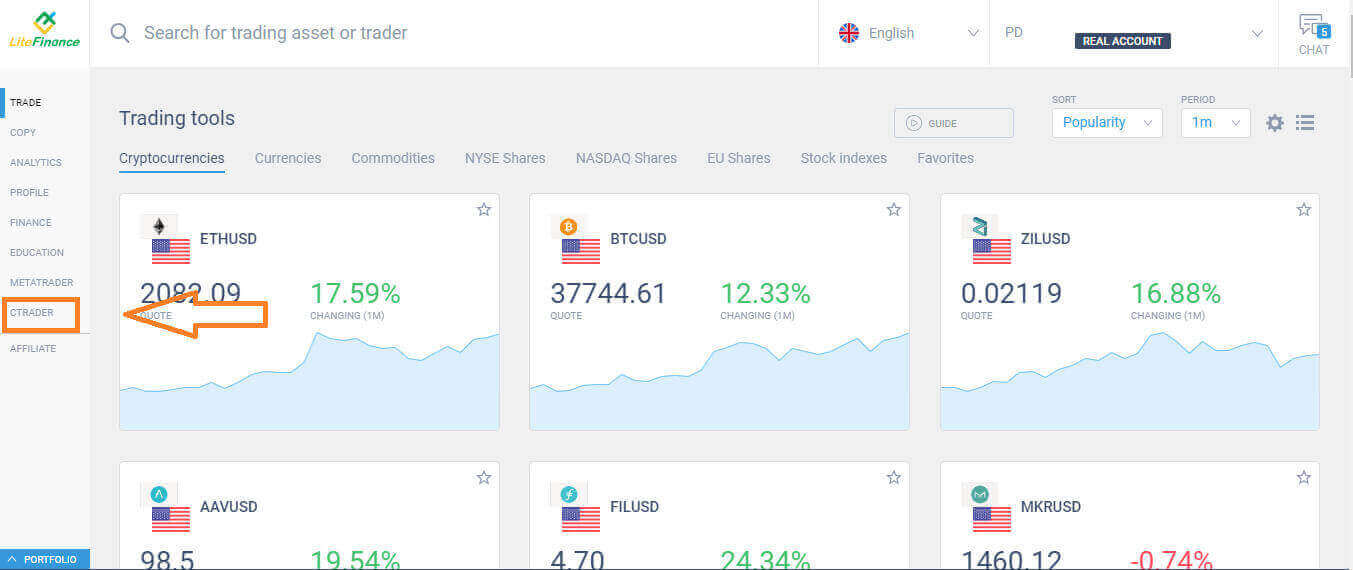
화면 왼쪽에 있는 "CTRADER" 아이콘을 선택하세요 .
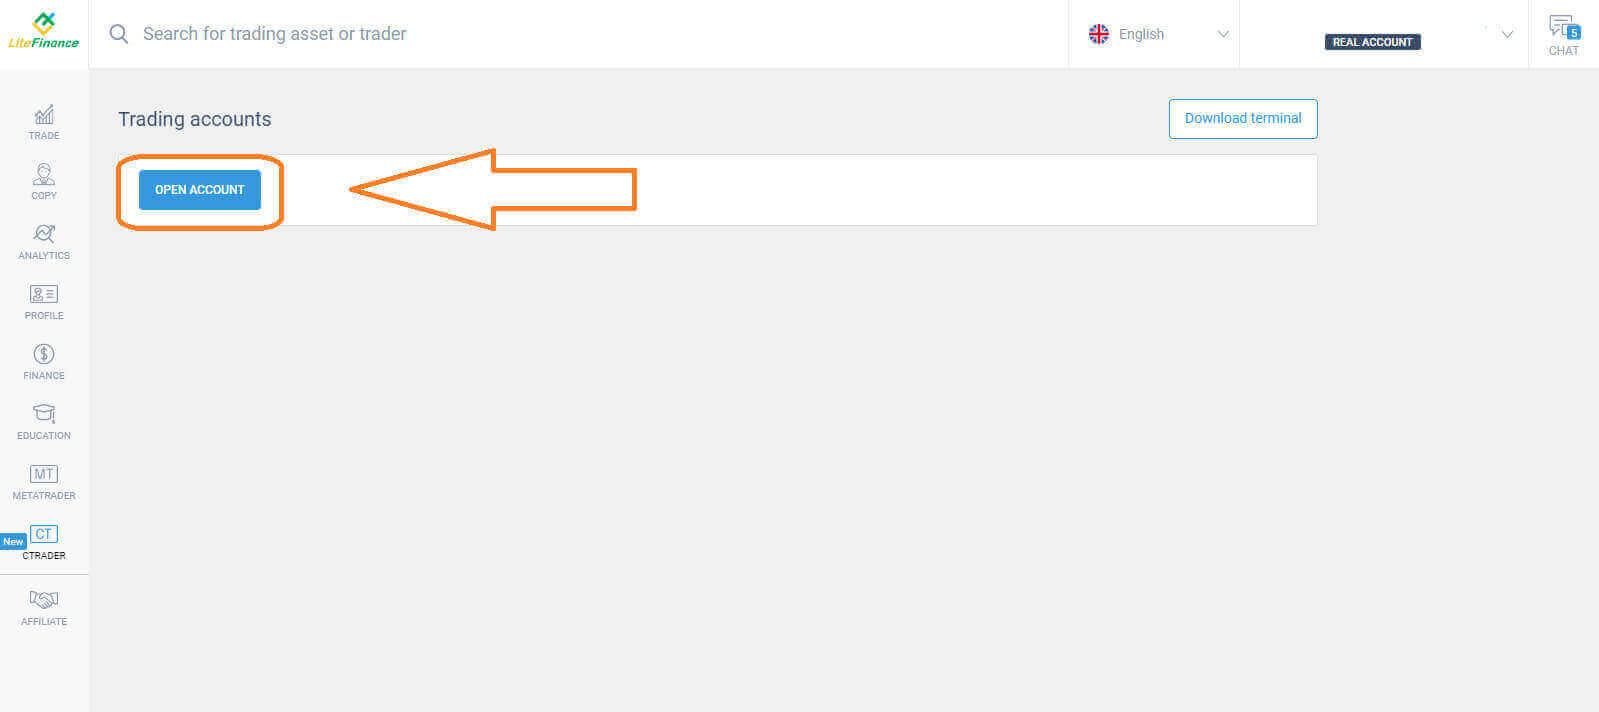
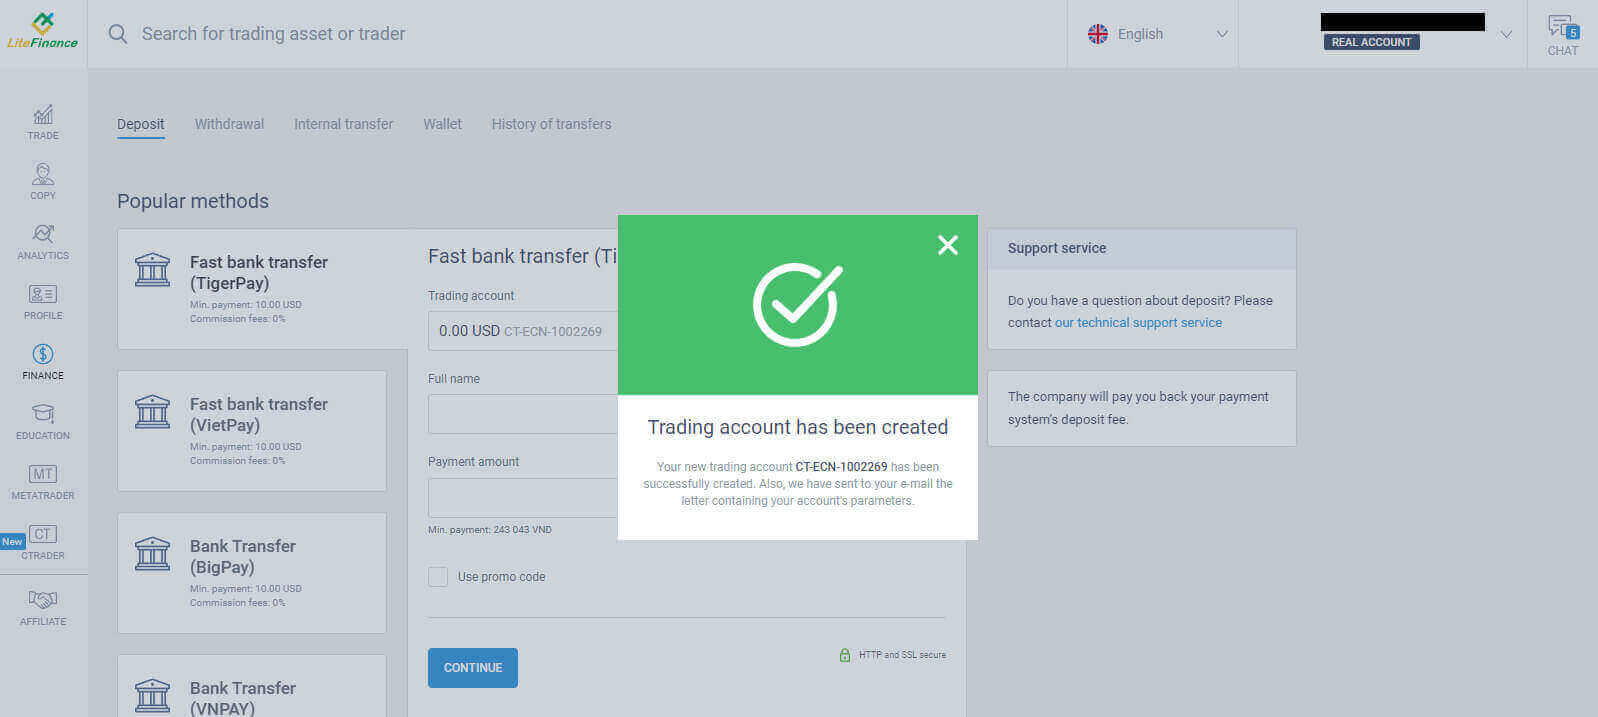
 계속하려면 "계좌 개설"을 선택하세요 . "거래 계좌 개설" 양식
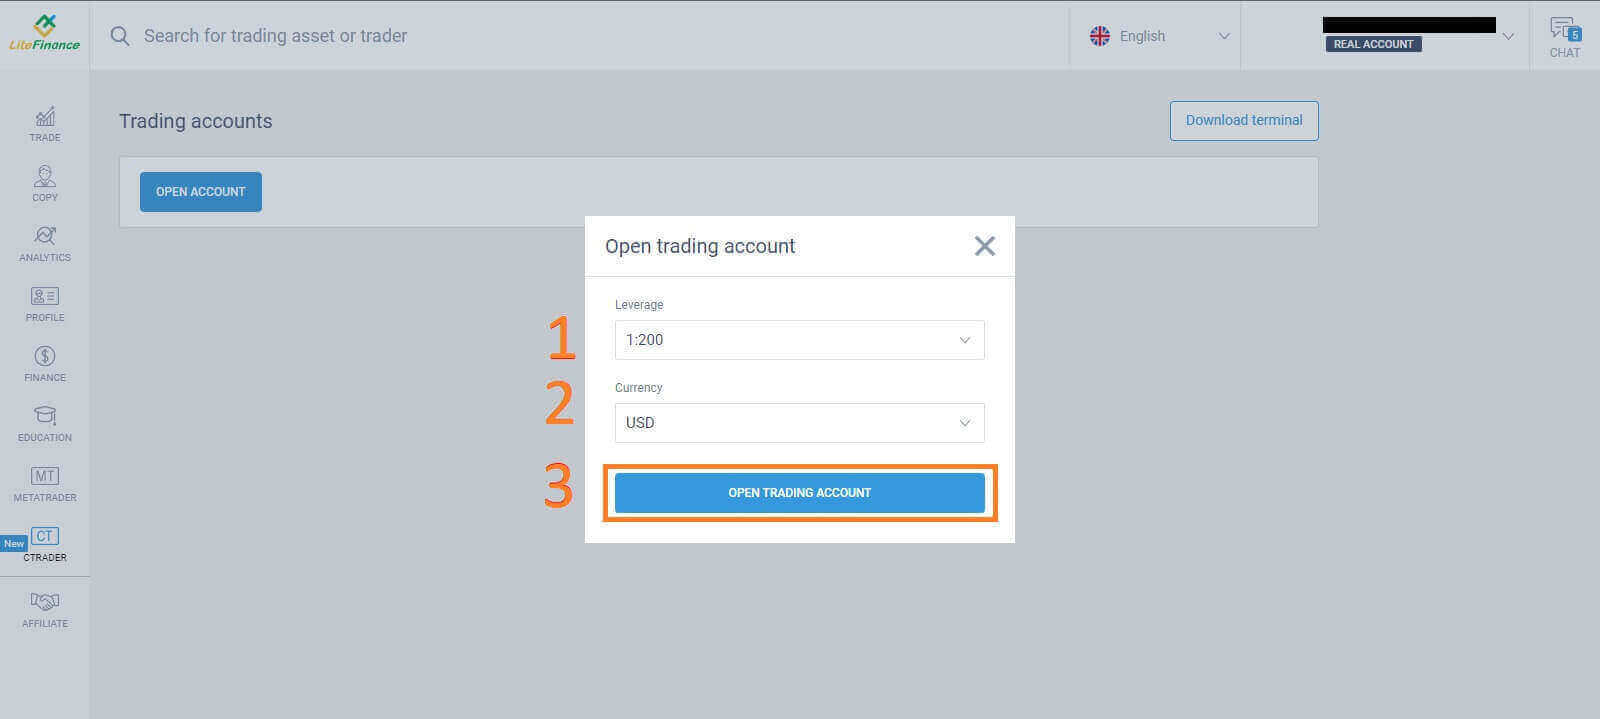
 에서 레버리지와 통화를 선택한 다음 "거래 계좌 개설"을 선택하세요 . 축하해요! 귀하의 거래 계좌가 성공적으로 생성되었습니다.
모바일 앱에서 LiteFinance 계정을 등록하는 방법
계정 설정 및 등록
App Store 와 Google Play 에서 LiteFinance 모바일 트레이딩 앱을 설치하세요 . 모바일 기기에서 LiteFinance 트레이딩 앱을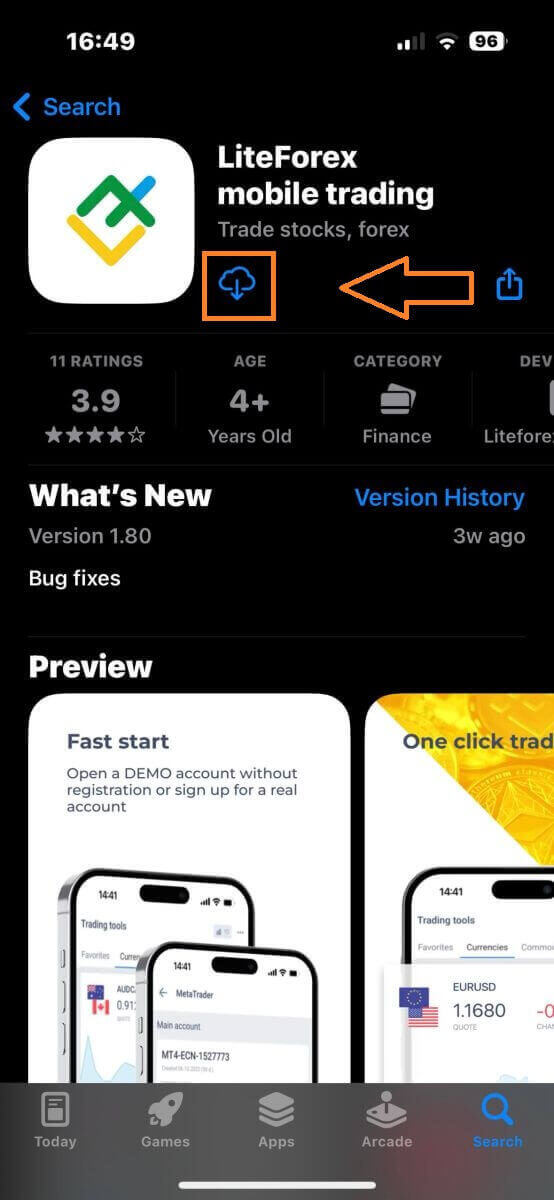
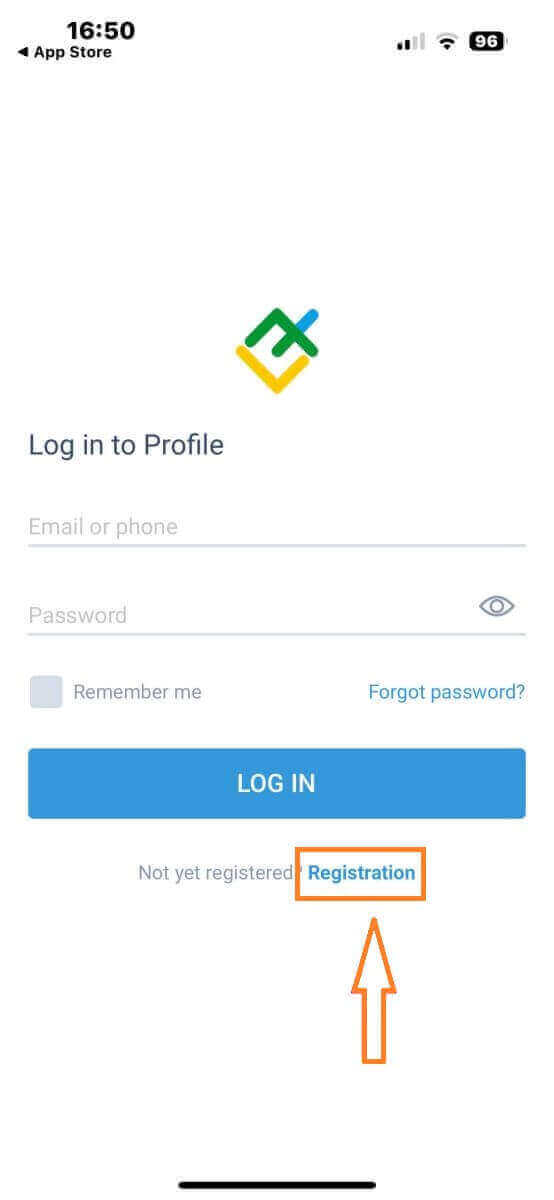
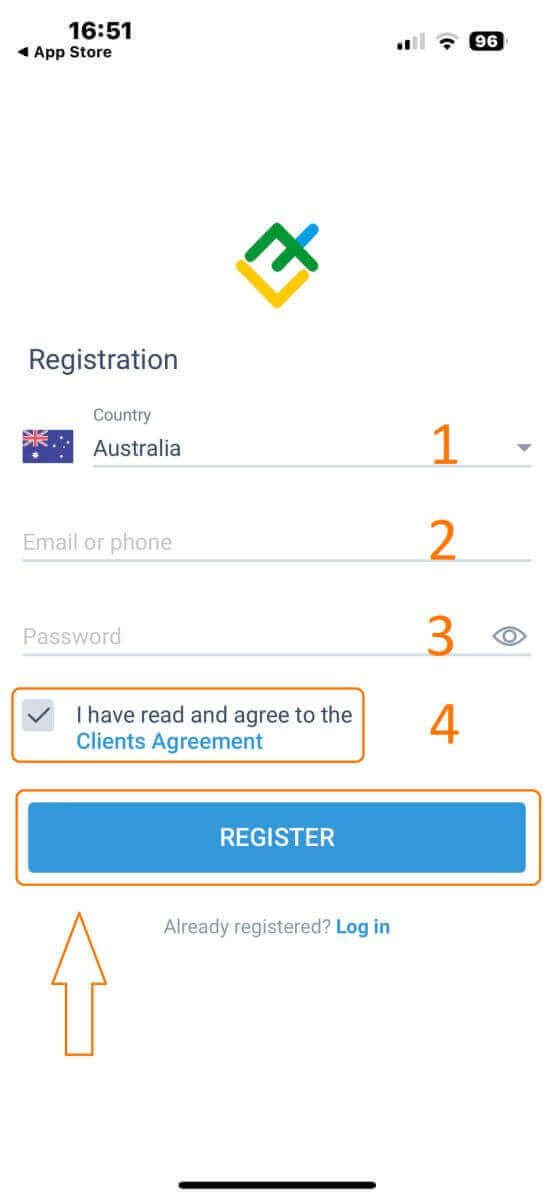
실행 한 후 "등록"을 선택하세요 . 계속하려면 특정 정보를 제공하여 등록 양식을 작성해야 합니다.
- 거주 국가를 선택하세요.
- 이메일 주소나 전화번호를 제공하세요.
- 안전한 비밀번호를 설정하세요.
- LiteFinance의 고객 계약을 읽고 이에 동의함을 선언하는 상자를 선택하십시오 .
1분 후 전화나 이메일로 6자리 인증번호가 전송됩니다. 받은편지함을 확인하고 코드를 입력하세요.
또한, 2분 이내에 코드를 받지 못한 경우 '재발송'을 터치하세요 . 그렇지 않으면 "확인"을 선택하세요 .
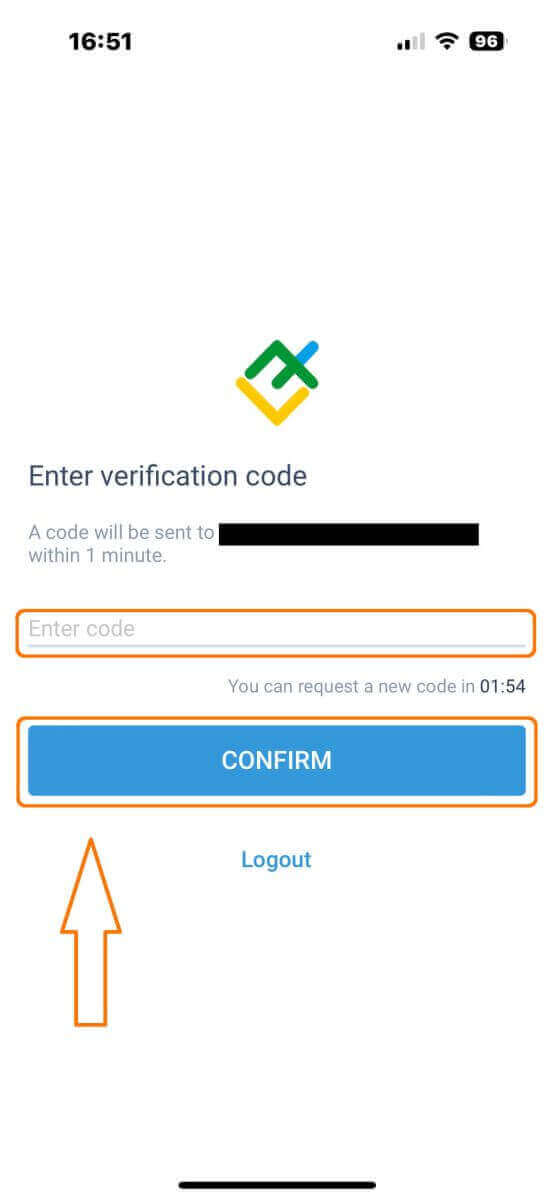
6자리 코드인 PIN 번호를 직접 구성할 수 있습니다. 이 단계는 선택 사항입니다. 그러나 거래 인터페이스에 액세스하기 전에 완료해야 합니다.
축하해요! 성공적으로 설정되었으며 이제 LiteFinance 모바일 트레이딩 앱을 사용할 준비가 되었습니다.
LiteFinance 프로필 확인
홈페이지 오른쪽 하단에 있는 '더보기'를 탭하세요 .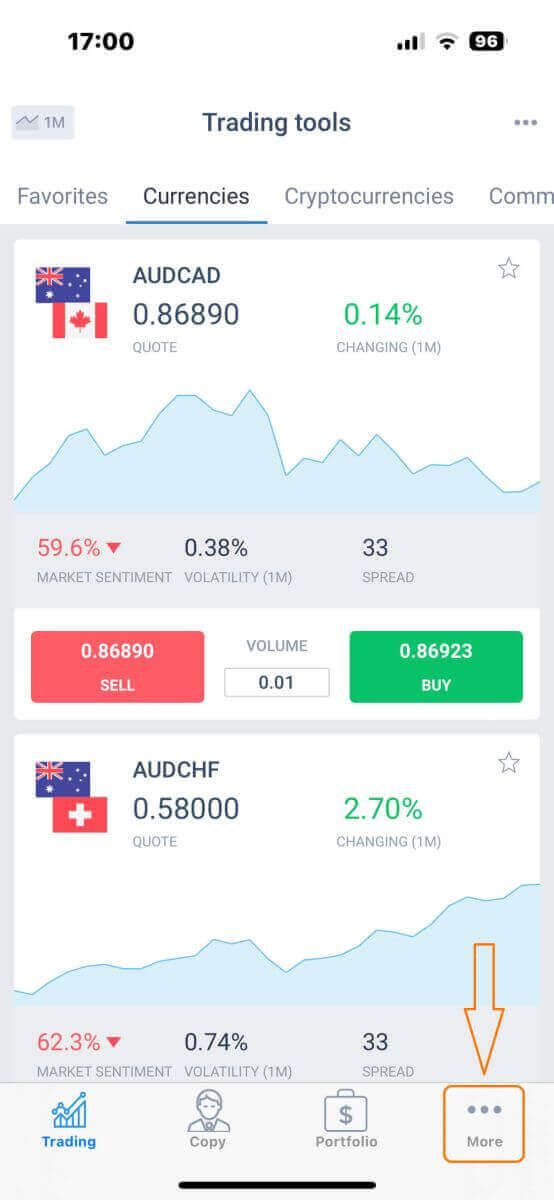
첫 번째 탭에서 전화번호/이메일 주소 옆에 있는 드롭다운 화살표를 클릭하세요.
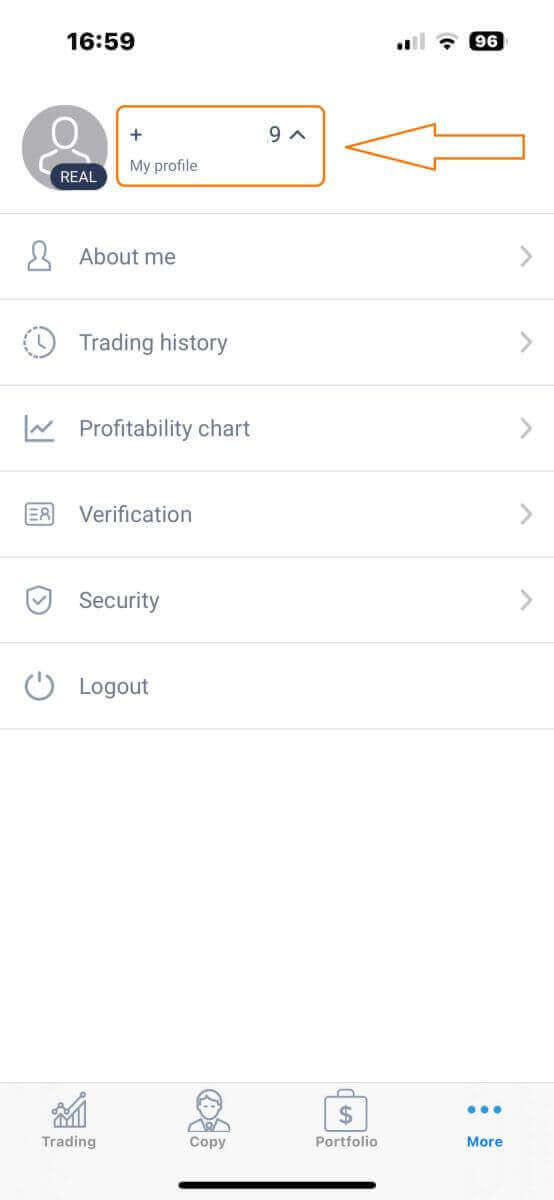
"인증"을 선택하세요 .
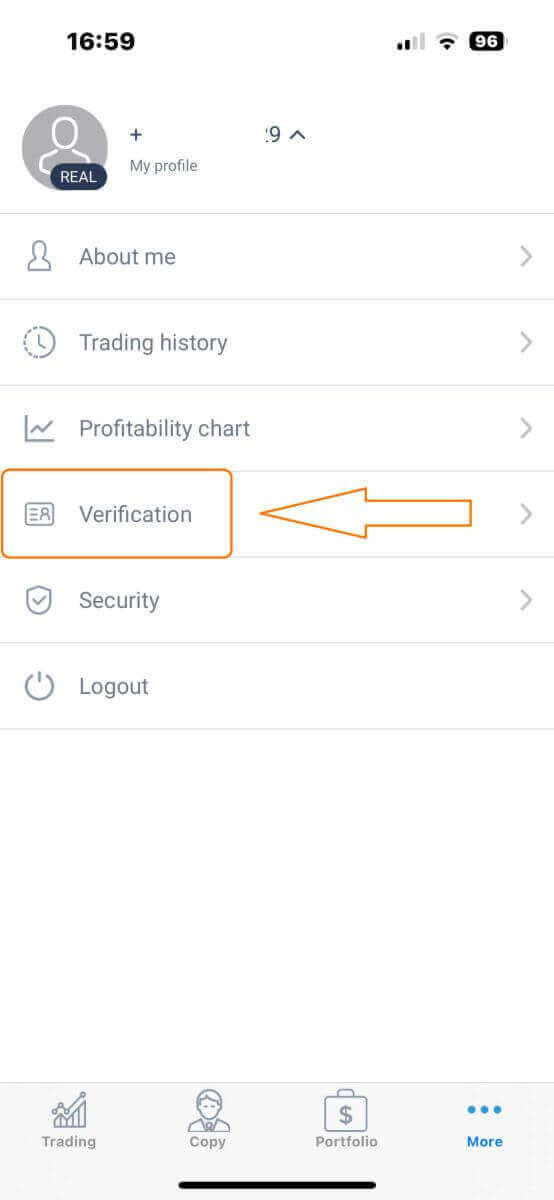
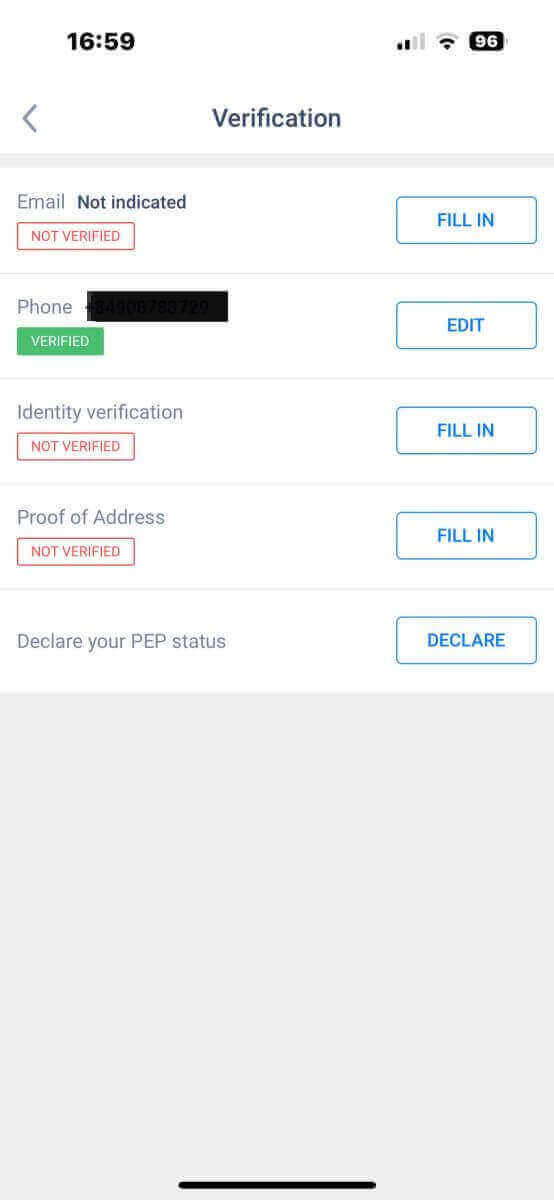
확인 페이지에서 필수 세부정보를 모두 입력하고 인증했는지 확인하세요.
- 이메일 주소.
- 전화 번호.
- 신원 확인.
- 주소 증명.
- PEP 상태를 선언하세요.
새로운 거래 계좌를 만드는 방법
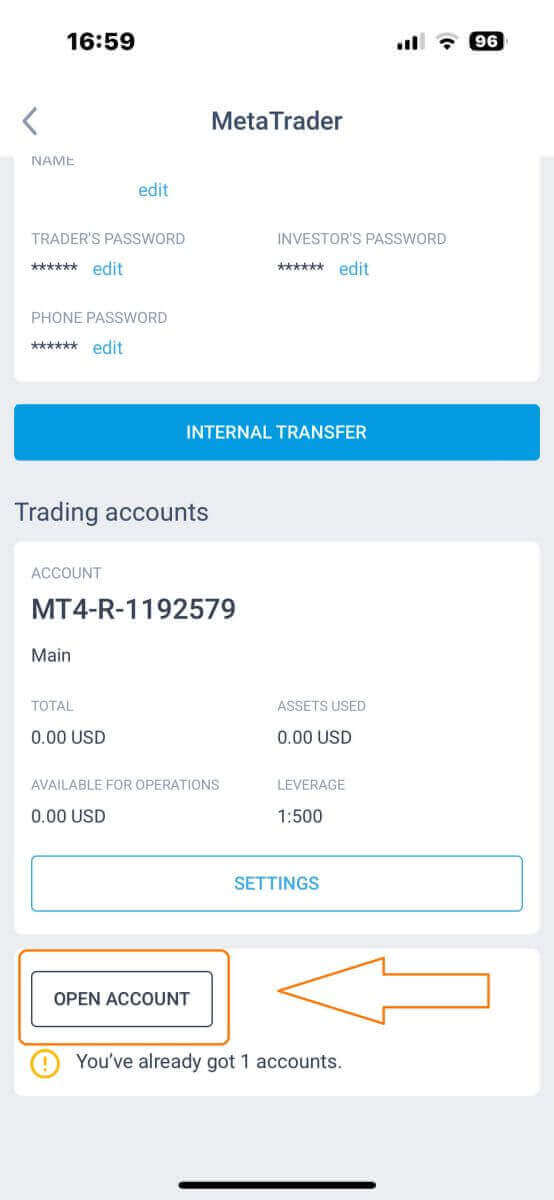
MetaTrader 에 액세스하려면 "더 보기" 화면 으로 돌아가서 해당 아이콘을 선택하세요. "계좌 개설"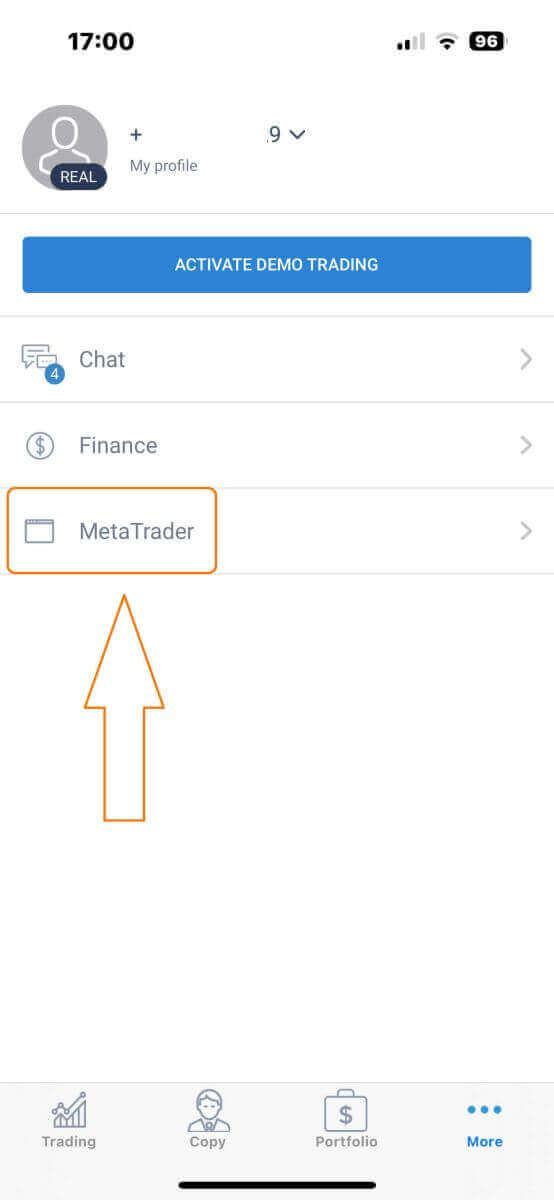
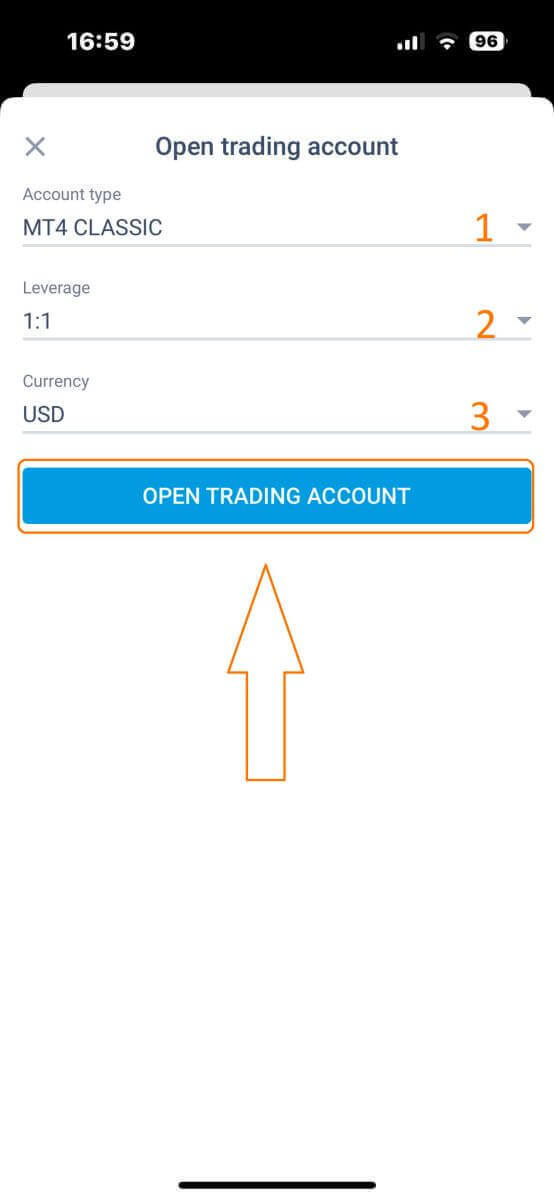
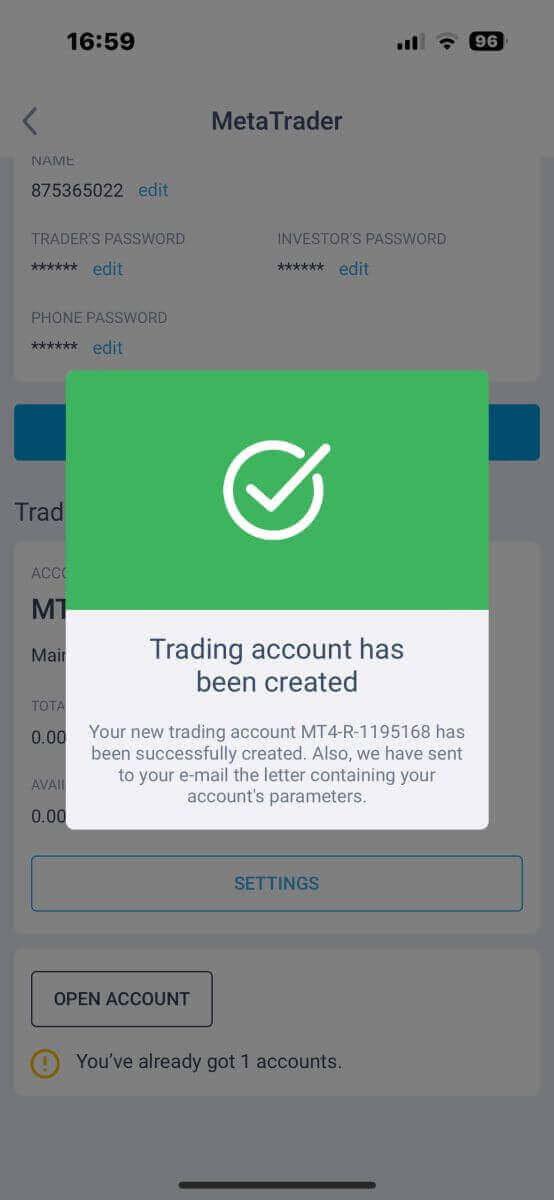
버튼을 찾을 때까지 아래로 스크롤한 후 해당 버튼을 탭하세요. "거래 계좌 개설" 상자 에 계좌 유형, 레버리지, 통화를 입력 하고 "거래 계좌 개설"을 클릭하여 완료하세요. 성공적으로 거래 계좌를 만들었습니다! 귀하의 새 거래 계좌가 아래에 표시되며 그 중 하나를 기본 계좌로 설정하는 것을 잊지 마세요.
